
Summer Starts Here - Save up to 70%
To see if this custom-fit item will work for you please tell us what vehicle you'll use it with.
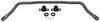
Minimize sway and improve the stability and driveability of your truck. Solid, 1-1/8" chromoly sway bar provides improved handling and safety. Adjustable anti-sway bar lets you choose level of stiffness. Easy, bolt-on installation.
Features:
Specs:

California residents: click here
Videos are provided as a guide only. Refer to manufacturer installation instructions and specs for complete information.
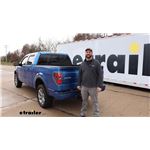
Hey guys, it's Jake here with etrailer. Today we have a 2011 Ford F-150 and we're gonna be taking a look at, and I'm gonna show you how to install the Hellwig rear anti-sway bar. This rear anti-sway bar is going to be an addition to the vehicle. You don't have to remove an anti-sway bar, because the rear of our F-150 does not come with one from the factory. What this is designed to do is it's designed to help control body roll to bring the vehicle back to center when going around windy turns or if you're hauling an uneven load, it'll help to offset that so that your drive is a lot more confident and comfortable. This anti-sway bar is going to have a very thick construction coming in at an inch and eighth thick steel.
It is a Chromoly steel, so it's designed to have a spring to it. So whenever it's being pushed down on the one side, the other side's being pulled up. So it wants to constantly recenter, which is gonna help to keep that truck from leaning too far from one side to the other. You're gonna see a pretty big difference with this truck because it doesn't have one on the rear. A lot of 'em that we do will take the old one off and put the new one on and it's definitely a thicker construction, but because this one didn't have one, I think we're gonna see a lot, a lot of good results.
Especially with these trucks being newer, they have softer suspension, so that wants to make the vehicle sag a little bit more when you're going around turns, especially if you have an uneven load in the bed of your truck or a load that's gonna want to shift when you're going on those inside or outside corners, the whole truck wants to start rolling. This is gonna help to prevent some of that. If you're having troubles with your vehicle swaying from side to side, or if you're having troubles with your trailer swaying, wagging behind you, this is gonna help with that. But I would highly recommend if you're adding a rear anti-sway bar, the whole vehicle is swaying. So I recommend installing the front anti-sway bar by Hellwig too.
So that way you have two good beefy anti-sway bars that are gonna help your whole vehicle to stay centered. This is not a very difficult installation. It doesn't involve any drilling. There's no sway bar to remove, so that really helps with the install. I will say, it will help to remove the spare tire, just drop it down out of place.
You can put it back when we're done, but it's gonna help to give you a little bit more room to work. But because we're working on an F-150, there's more than enough room to lay under there to get this job done. With all that being said, let's go ahead and pull it in the shop and show you how we got it done. To begin our installation, we're gonna need to lower down our spare tire. Now for your install, you may not have to do this. For ours, we're going to do it so that you can see everything a lot better, but you might be able to do it without lowering it, but we'll get it lowered down by removing our little plug here with your driver's key, and just rotate our spare tire down and out of the way. And we're gonna take a few of our brackets and we need to get 'em installed up here on our shock mount, we're gonna take our threaded plate. It's just gonna have one hole in it. It'll be offset. So you want to take that threaded hole, slide it through the end here, and then we'll get that to line up at the center of this hole. Then we can take one of our shorter bolts that comes in our kit, and then one of our U brackets. It'll have two holes in it. This is where one of our dropdown brackets is gonna mount to. We're gonna put some blue Loctite on this bolt before we get it mounted up. Now we'll take that bolt, slide it through our bracket, and then get it to start inside that lock. We are gonna repeat that process on the other side of the vehicle and we'll come back with a torque wrench and torque it down to the specifications in the instructions. We're gonna be using a 19 millimeter socket in order to do this. Now we need to put our bushings inside of these hoops. We're gonna do all four of 'em while we're doing this because this can kind of get messy. So we'll take the tube of bearing grease, we'll squirt it onto the bushing. Or the tube of bushing grease and you just wanna push it down inside that. And then what we could do, we'll take all this excess off here and then we will smear it on the other side. And any of this stuff that gets everywhere, we can just take a towel and wipe the rest off, which we'll have each of the ones that we just put the bushings inside of. This is going to eventually thread into here, but we need to put a jam nut on first so you have a very large nut in your kit. We're gonna thread one of those on, and I'm just gonna thread up all the way so that it's out of our way because this, we're going to spin it inside of here in order to get the right height. So we'll start with that and then we can get it up there, put it in place, and then we can spin this in or spin it out in order to get the right height adjustment. Now we're gonna take the bushing inserts. We're gonna, it's a little tube. There's four of 'em that come in your kit. You're gonna put each one of 'em inside of these bushings. This is gonna be easiest to do with a vice. If you don't have a vice, you can just use a pliers. But we're gonna use this to press it in place. Make sure you push it in all the way. Looks like you can go a little bit further, just like that. Take our end lengths and you wanna slide this up into this bracket. We're going to have to kind of smash it in place. So if you can get a hand on it, you can tell our rubber is sticking out past the width of the inside here. This bracket might be a little misformed, so we may have to spread it out a little bit, but we're gonna try to push it up in there first. You want the curvature of this bar to be on the inside of your leaf springs. There we go. Now we'll get those holes lined up and get our hardware in place. We'll take our silver bolt, slide it into place. Then we'll take one of our locking nuts and thread it on the backside. We're gonna leave this loose until we get everything installed so we can make any adjustments if we need to. You've seen our grade eight bolts. You might be able to do this by yourself by laying underneath the vehicle. I'm doing it by myself. So we'll just take our one bolt, do the one side, and we're just gonna let our sway bar hang here for a second while I get the bolt in the other side. Get that slid in and then we'll follow it up with our flat washer and our lock nut. Now we need to lift our sway bar up again. There's just gonna be a lot of fitment here. Your U-bolts need to be about where this darts to turn, 'cause that's where we're gonna have to put our bushing. So we'll take our bushing. There's gonna be a little split in it right here. We're going to open that up. You wanna put some of that bushing grease on the inside, we'll roll it up in place. You don't want to slide this side to side if you don't have to, but now it's ready for our bracket. We're gonna do the same thing to the other side. We'll take our brackets that have this V cut in it. They're gonna go up first 'cause they're gonna rest up against the bottom of the axle. Then we'll take this bracket. It'll have to go around our bushing and this can be tricky. It's definitely helpful if you have another set of hands, but we'll take our washer, slide it on here, and then we're gonna follow that with one of our lock nuts. Now we're gonna take a 19 millimeter socket, snug each one of these up. We're gonna go back and forth, when you're tightening down U-bolts, that's the way you want to do it. Then we'll come back and make sure that we have the same amount of U-bolt sticking out on each side. I will come back and torque these down to the specifications in the instructions. Take our bolts out of the ends of our sway bar. You can tell that our sway bar is not level because it's from front to back. It's sloped a little bit forward. You can use any of these three holes and you want your end lengths to be straight up and down. So you want it to be perpendicular to the sway bar. We'll pop this bolt out. We've already got the other side out. We'll take this one off, take this bolt out and most of the weight should be held by those bushings, but essentially you want to get it lined up so that our sway bar is level, which is right about there. And then you want this end link to be straight up and down as you can get it. So you wanna move it over. And I think we're gonna go, it's a little bit tapered to the side, but that'll be okay. Once we get this twisted up to line up with this center hole, I want you to get both sides leveled out. We'll take our bolt, slide it back into place. And once you got everything lined up the way that you want it, you can come back and tighten and torque all of our hardware to the specifications and the instructions. The last thing we need to do is just snug up this jam nut. Another note I would like to make is that these holes on the side, although you should find the best one that fits straight up and down as you get tighter on these holes. So the furthest one towards the end, as you get tighter, they're going to make the bar a little bit stiffer. So if you find that it's not really doing much for you, move it in one hole at a time. Well guys, hopefully this video helped you decide whether or not the Hellwig rear anti-sway bar is right for you and your 2011 Ford F-150.
Average Customer Rating: 4.4 out of 5 stars (5 Customer Reviews)
Minimize sway and improve the stability and driveability of your truck. Solid, 1-1/8" chromoly sway bar provides improved handling and safety. Adjustable anti-sway bar lets you choose level of stiffness. Easy, bolt-on installation.Didn't fit my vehicle as specified, had to use adapter and longer bolts.
love the service
Good product
Works well
Info for this part was:
At etrailer.com we provide the best information available about the products we sell. We take the quality of our information seriously so that you can get the right part the first time. Let us know if anything is missing or if you have any questions.


Thank you! Your comment has been submitted successfully. You should be able to view your question/comment here within a few days.
Error submitting comment. Please try again momentarily.