
To see if this custom-fit item will work for you please tell us what vehicle you'll use it with.


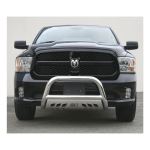
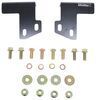
Rugged bull bar with stainless steel skid plate protects your Ram 1500's front end. Integrated mounting points let you attach aftermarket lights. Rustproof stainless steel. Easy bolt-on installation with included hardware.
Features:
Specs:

Videos are provided as a guide only. Refer to manufacturer installation instructions and specs for complete information.
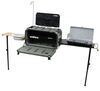
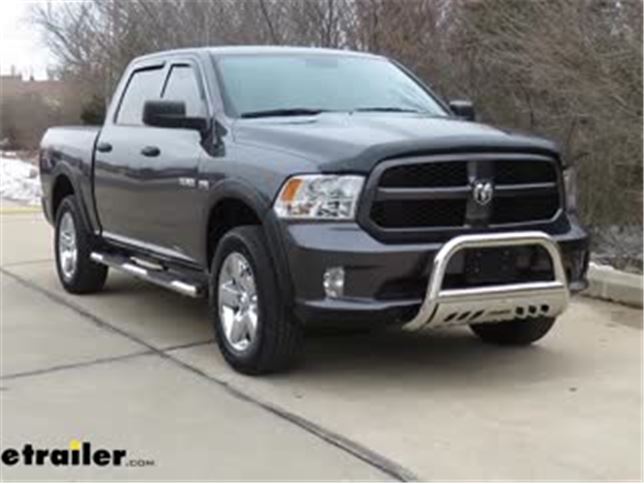
Today on our 2018 Ram 1500 we're going to be taking a look at and showing you how to install the Aries Pro Series Bull Bar with Removable Skid Plate.This is what the bull bar is going to look like installed. Not only is it going to protect our Dodge Ram's front bumper, it's also going to add a little bit of style. What's also cool about this is underneath these plugs, these are going to be holes to mount additional accessories such as lights. Not only does this skid plate help protect the bottom of our Ram from tall grass or any other road debris, if you'd prefer it to be removed, it can be. If you do need to remove it, it's really easy. There's these four screws on each corner just like this.
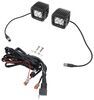
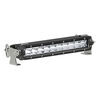
If you do want to mount lights here it will accept round lights up to 5-1/2" in diameter. Keep in mind if you do do that, it will block your front license plate. However, they do offer a relocation bracket that you can find on etrailer.com.The tube diameter itself is 3", which gives it that rugged look. Now in this position from the bumper to the outside edge of the bar, it's about 5-1/2", but keep in mind you can adjust it quite a bit, inward or out, to work for your setup.This bar has a polished finish. However, if that's not quite your style, they do offer many more finishes to match your truck perfectly.
It's a no drill installation and is really easy to do. Let's show you how to do it, now.To begin our install, we're going to need to be underneath the truck that way we can remove the splash guard. Here along the inside of the bumper we're going to have multiple push style fasteners along the edge just like this. To remove them, you can use a flathead screwdriver and lightly pry up the top portion of it. And sometimes if it gives you some trouble, a trim panel removal tool will give you an advantage.
You can pry it up like that and then get underneath the bottom portion and lift it out. Now we're going to do that for all the fasteners along the splash guard.With all of our pushpin fasteners removed, we can get our 10mm bolts removed as well. All right, now to get our splash guard off, we're going to have to start pushing out from one side and as we go along there's going to be some tabs like this that you're just going to have to lift up, like I said, as you go along and pop them free from our splash guard. We're going to do that all the way to the end. There you go.I just want to point out where our attachment points will be.
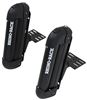
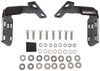
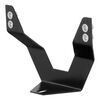
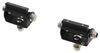
Up here along the frame rail, it comes to the bumper, our bracketry is going to attach to these two studs and also we're going to use a bolt to attach to the frame right here.Now our next step to proceed, we're going to have to remove these two nuts. We're gonna be using an 18mm socket to do that. All right, do the same thing to both sides. All right, so now we can take this bracket and we're going to put it over our studs. However, I do want to point out these are side specific. If you notice or is a D stamped into the bracket for driver's side, the P will be for the passenger side, so just make sure you got the bracket on the right side.Son now we're going to take it and put it right over the studs and then with our factory nuts that we just removed, go ahead and get those threaded on. Now, all the brackets, when we we're putting them together, we're just going to keep them hand tight. That way there's a little movement and it'll be easier to get everything together.So, next we're going to take our J style bracket and put that up in place. Now this is the same at the other bracketry. There is a D stamped on the side for driver. The other one has a P for passenger. So we're going to install it like this, but the J facing the front of the vehicle. Gonna slide it over the studs and we're gonna put a flat washer on it, a lock washer, then find a nut.Once again, just keep everything hand tight. Now after you get this one done, do the same thing to the other side. Now we can loosely install this bracket.Now, for whatever reason, these brackets are not lettered, but the way we're going to do this is make sure that this angled portion here towards this hook part, this is going to face the inside of the vehicle, or be on the inside of the J bracket. So how we're gonna do this, just set it up there, there's gonna be a bolt that attaches together right here. But I did find it makes it a little easier to loosely install this bolt first. This will be the bolt that has a little finer threads and is gold in color. We're gonna put on our lock washer and then our flat washer. Go ahead and get this started. And we can take our other hardware, should be the smaller bolt, put a flat washer on it and starting from the inside, slide it through like that. Then on the other side, flat Washer, lock washer, and finally a nut. Now we're going to repeat that process on the other side.Now, in order to reuse our splash shield, we're going to have to cut some holes in it that we're bracketry can protrude through it. The best way that I found to do that is to just put it up as close as you can to its original mounting location and check and see where the brackets are making contact. Then I used a marker to draw a little diagram. That way we can cut this out and see if it'll fit.Now, rule of thumb that I like to use is you can always cut more off, so I like to cut as little as I can and see if it'll work. Like I said, we can always take more off if we need to. This is what the splash guard is going to look like trimmed. Now, you can use a cutoff wheel, a dremel tool, a sharp knife, some snips, whatever you may have handy to create this opening. Now we can put it back on the same way we took it off.All right, now before we put our bull bar in place, I just want to go over what hardware we're going to be using because with it installed, it's going to be tough to see. So of course our bull bar, will slide over this bracket and these bolts will hold it in place. So we'll have a bolt and a flat washer, put it through like this, and on the other side we'll use a flat washer, a lock washer, and finally a nut. All the mounting points will be the same.All right, now with the help of a friend, I'm gonna go ahead and put our bull bar in place. So we'll slide it inside of our bracket and we'll get this hole lined up with this one and put our hardware through it.Now with this play, we can position the bar how we're going to want it so you can put it up higher, down a little lower. We're going to go somewhere in between. We're going to hold it like that and then tighten down one or two to keep it there while we finish the job. We're going to use an 18mm wrench to hold the side where the nut is, and an 18mm socket to tighten down the bolt. Now we can go ahead and do that to the rest of them. Now we can come back down underneath and tighten up all of our remaining hardware. Once we have that done, we can look at the bar in front and see how it looks. If we need to make an adjustment to it, we'll carry on and do that.With everything tightened, we went ahead and checked the position of our bull bar. We actually made a small adjustment, so now we're going to finish tightening the bull bar down itself.The only thing left to do is apply a layer of non abrasive wax to protect it and get it shined up, and then we'll be ready to hit the road.And that'll do it for our look at and installation of the Aries Pro Series Bull Bar with Removable Skid Plate on our 2018 Ram 1500.
Average Customer Rating: 4.8 out of 5 stars (12 Customer Reviews)
Rugged bull bar with stainless steel skid plate protects your vehicle's front end. Integrated mounting points let you attach aftermarket lights. Rustproof stainless steel. Easy bolt-on installation with included hardware.The install is a little mess up. I put it in my 2004 Dodge Ram 1500 and technically I have a 2500 front bumper. Fits perfect and really good looking.

Nice, solid bull bar. The powder coat matches my nerf bars and the stainless steel skid plate looks good with the chrome grill. It was easy to install and took only 15 minutes or so.
Looks good on my 2008 Nissan Titan. I ordered the optional license plate holder and extra lights. Best to install them on the bull bar BEFORE you mount on the truck. This project was a simple bolt-on upgrade. Highly recommend.
face it, these things are just for looks. It looks good. Unfortunately, for Silverado you must remove factory tow hooks. Maybe I can figure out a workaround for that.
It helped my Jeep GC do its job to protect me in a head on accident. I would buy it again.
Nice product and easy to install. I got it today afternoon and installed it in less than an hour and a half..
Product was shipped on time no damage bolted right in. instructions not 100% clear had to cut out, instead of knocking out where goes through to bolts to the frame. my vehicle didn’t come with the tow hooks other than that product was as described I would recommend . I got tired of people who can’t park bumping my vehicle works great!
Excellent job for help getting the correct part for my car.
Shipped the next day, great service.
My third purchase from etrailer with same great results.
it bolts right up, except I had to modify the lower grill plastic guard. Plus if you order the plate holder for your tags, better to put it on first
Good product though
Easy install, holds up well to the elements, and looks great!
Do you have a question about this Grille Guard?
Info for this part was:
At etrailer.com we provide the best information available about the products we sell. We take the quality of our information seriously so that you can get the right part the first time. Let us know if anything is missing or if you have any questions.


Thank you! Your comment has been submitted successfully. You should be able to view your question/comment here within a few days.
Error submitting comment. Please try again momentarily.